2018 08 04 Panasonic Microwave ST671S Replacing the Bulb
My experiences with buying and installing a replacement bulb for a Panasonic Microwave Oven model ST671S. Might be called a globe or incandescent lamp.
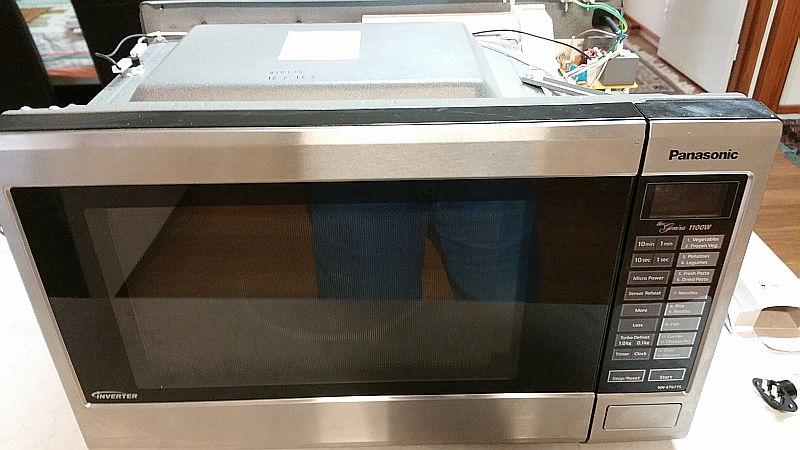
Featured image is of the Microwave with its main cover off
So the light bulb (globe or lamp) has blown out inside the microwave and when its running you cant see anything inside. So you don’t know if your food is bubbling, burning, or just cooking nicely.
You look inside and you can see where the bulb is. Yep its hidden behind some metal and is inaccessible from the cooking area. You curse and swear. What company would design a product where you can’t easily change the bulb. Well Panasonic of course. I have a Panasonic Microwave Oven model NN-ST671S. According to the manual its similar to other models NN-SD691S, NN-ST651W and NN-ST641W. These models date from around 2011 and seem to have been for Australia and NZ. I bought mine from the Good Guys in Feb 2013.
So the bulb lasted 5 1/2 years. Not bad really when I think of it. Was it worth fixing or getting a new model?
So I looked around and found information on Whirlpool which suggested I could get a bulb but replacing it was ‘dangerous‘. Shit! So I looked at a suggested site from Whirlpool Notes on the Troubleshooting and Repair of Microwave Ovens. I noted the area about Safety and nearly scraped the idea of getting a new bulb and installing it myself.
Then I looked at the site the Whirlpool suggested I could get a replacement bulb for my Microwave Big Warehouse Spares and noted for my model and bulb there was an installation tip post by Barry of QLD. He rated it easy and taking 5 mins. Of course he would he was from QLD. I looked further and found a You Tube video on a similar model SD691S. However it said one needed a screwdriver with bits PH2 & T20. I had one of those. Otherwise it seemed easy enough.
So I went ahead and ordered the right bulb from Big Warehouse Spares. It cost me $26.09 plus postage through a courier of $12.99. There was also a 1.5% surcharge on using a credit card. I also had to set up an account with my email.
I ordered my bulb and it cost me AUD $39.66 delivered. I did this on a Mon and it was delivered to my front door on Wed. I wasn’t home and no one signed for it, who cares. By the way the Big Warehouse Spares are at 8 Ruddock St, Corrimal, NSW, 2518, near Wollongong (you cant go there). They seemed very efficient and have spares for heaps of similar products.
Note one reader recommends General Appliance Parts. They are in Melbourne on (03) 8373 6044 with flat rate shipping of $7.95. I am unsure if they supply bits for Panasonic Microwaves. However he stated “The same globe cost me $17.90 delivered, the range is great and service flawless” so I assume they have the Panasonic globes.
Installing The Replacement Bulb
Click on any of the thumbnail pictures to see a larger version
Preparation
Make sure you have read up on safety and that the bulb is the right one for your unit.
Move your microwave carefully to a nice flat area that you can work in.
Plug the microwave in a power socket and use a proper extender cable if you need to. Make sure the power point is turned off. Its plugged into the power socket to ensure the unit is connected the building earth.
Empty the microwave of its glass plate and the roller ring it sits on are removed

Taking off the Cover
Using a phillips head medium screwdriver unscrew the five screws that hold the main cover onto the chassis. Make sure you place the screws where you can find them. None of mine were that tight so a battery driver was not really necessary.
You may find the side may pop out a bit after removing the screws. That’s OK as you need to be able to the lift the whole cover off the chassis. I found the left and right side came off easily but I could not move the top. It seemed to be fixed with something. After some giggling of the whole cover it came free.
Replacing the Bulb
Now I looked at the right hand side (from the front) and tried to locate the bulb. Shit there was no bulb. I looked back at the video and notes and then looked for the connectors that held the bulb in place. I soon realised that the bulb was under a shield of sorts and the connectors held the bulb underneath but vertically. In the picture to the right you can see two white sockets in the top left side.


Also the 2nd photo is a close up of the area where the bulb is. You can see the base of the bulb (its upside down) on top of the metal case with two white connectors attached to it.
Now you need to use a flat screwdriver to lift up the two metal lugs that hold the bulb base in place. Once the lugs are more vertical you can use a long nose pliers to straighten them which is necessary to remove the bulb.
Next using the white connectors, carefully slowly pull the bulb assembly out of its cage. You may have to jiggle it a little if the lugs are not vertical as it only just fits through the hole. Once removed it will hang easily in mid air supported by the cable connectors.
Now you have two pull the two white cable connectors off the metal blade style connectors on the bulb. I found one came off easily and one was quite stubborn. I finally got it off, not with brute force, but using a small blade screwdriver to force down part of the connector and lever it off gently. Once levered a little it finally came off easily.


Once removed I laid both bulbs, new on the left and old on the right on top of the microwave chassis and compared them. The bulbs looked compatible in shape and size although the blade connectors were slightly different.
Now I simply plugged in the new bulb to both connectors. Then I turned on the power of the unit at the power point to see if the bulb worked. It didn’t. So I opened the door of the unit and it worked. Then I turned off the power at the power point again.
Now I carefully inserted the bulb assembly down into the hole from which it came. It took a few jiggles and straightening of the lugs to enable the bulb assembly to fit neatly onto the metal. Then I used a screwdriver to push the lugs down to hold the bulb in place. It was important not to press down too hard whilst installing the bulb as the box chassis underneath was not well supported and could bend easily if not careful.
After this I retested the microwave by turning on the power and opening the door. It was fine. I then turned off the power again.


Putting Back the Cover
Now I learnt that the cover was not exactly as I thought it was. I put the cover over the unit and screwed down the top screws on the top left and right. Then I realised the top front was not being held down. It took me a little time to realise that the cover had a recessed piece of metal that ran along the front edge of both sides and the top. This meant I had to get the cover to fit into the chassis frame to sit between the outer cover and the recessed metal pieces around the three sides. A bit tricky. So I started with the top by gently driving it down so the cover connected into the top front bar of the chassis. Once this was achieved I then screwed in part way the top left and right screws which would hold the top front and rear section in place until I could align and get the two sides into place. Once the top was in place both sides were sticking out at the front.
I then addressed each side separately and one by one I gently bent the side so that it would connect with the chassis and then I could screw down all the five chassis screws at the back. I guess that arrangement explains why all the screw were on the back. This was a bit fiddly but worked once I understood it. The attached pictures give a little insight into the cover arrangement as well as the unit with the new bulb fully fitted.


Cleaning
Now whilst you have the unit on the table its a good time to clean inside thoroughly. You will find some old food pieces caked along some of the inner edges. Get a portable LED light and check carefully and clean with a damp cloth. Also you have the plate out so clean it as well.
Tools:
I used the following tools:
- Long nosed pliers
- Phillips head screwdriver
- Maybe a small flat head screwdriver
Finally
Well that’s it. Thanks to those that provided information or videos. It shows that design of household appliances needs a lot more refinement. A simple job of replacing a bulb should not be so hard. Its time to consider using long life LED bulbs or lamps.
Comments
Matt D, mattd@hotmail.com, commented on 6th June 2021.
“Thanks Greg. Made the process much easier with your guide.
I would recommend pointy nose pliers for the metal tangs holding the bulb in when removing and reinstalling.
Also with the recessed slots around the front of the cover, definitely better to slot in the top which has several slots then do the sides with one slot each.
Queenslander!!”
Wow those parochial Queenslanders. My mum was one! I did use pointed long nose pliers.
Hi there, I have same microwave here in NZ. The bulb jas been blown for approx 1yr and I’ve had a replacement sitting at home for a few months…..
As I was told I’d have to take the cover off to change the bulb! What a stupid design.
Anyway just want to say a big thanks for your very honest and helpful tutorial to change light bulbs in this model microwave. Appreciate your time and generosity to share your knowledge and experience.
I am now confident to go and change the bulb in our microwave.
Kind regards,
Daniel
Thanks Greg, very helpful description and photos. It is a bit late for you now but I recommend Genuine Appliance Parts for spares. The same globe cost me $17.90 delivered, the range is great and service flawless (so far?)
Thanks Greg for the post re. Changing the bulb on Panasonic microwave.
Easy to tackle after reading your instructions. Saved me money.
Cheers
Kevin
Thanks Greg.
Made the process much easier with your guide.
I would recommend pointy nose pliers for the metal tangs holding the bulb in when removing and reinstalling.
Also with the recessed slots around the front of the cover, definitely better to slot in the top which has several slots then do the sides with one slot each.
Queenslander!!
Thanks Greg from me too.
Your precise explanations really helped me to replace the light in within 15 minutes. You are really great in your instructions and really helped me.
Thank you,,
Success! Thank you very much Greg. You made the process really easy.
Marina
Thanks for the kind commemnts
Amazing thank you! I have same microwave, just followed above guidelines and took 5 minutes. I bought the bulb: ‘1pcs Z187 T170 2A 25W LED Microwave Oven Bulb Globe for LG Panasonic Daewoo 220V’ on ebay for $12.99 delivered (model Z187). Link: https://www.ebay.com.au/itm/305365048000
This is great. Thanks for the very clear instructions !
Cheers Doug